Serving Minnesota & Iowa for over 25 years
Choosing among front entry doors is more than selecting a color that complements your exterior walls. The right door must balance security, weather resistance, energy efficiency, style, and installation requirements. A warm wood finish may look inviting, yet it can demand more maintenance in wet climates. A steel door may provide strength, but its surface can dent or show heat damage. Every material has trade-offs.
This guide presents ten practical tips for making a better buying decision. It considers door construction, frame quality, insulation, glass, hinges, locks, swing direction, measurements, warranties, and professional installation. Manufacturer specifications provide useful evidence, while an experienced installer can identify problems that product photos hide. Check the rough opening, threshold height, wall condition, and nearby plumbing before ordering. Measure twice.
Small details matter. A poorly sealed threshold can allow cold air and rain beneath an expensive door. Decorative glass may reduce privacy unless it includes textured or laminated glazing. Even a reliable lock will perform poorly if the frame is weak or incorrectly aligned. Energy ratings also deserve attention, especially when the entrance faces strong sun or winter winds.
There is no perfect door for every home. A choice that works beautifully in a dry suburban climate may disappoint near the coast. Budget estimates can also miss delivery, trim, hardware, and removal costs. These ten tips are designed to encourage careful comparison, practical questions, and a little healthy skepticism before purchase. A better entrance begins with accurate information, not a rushed showroom decision.
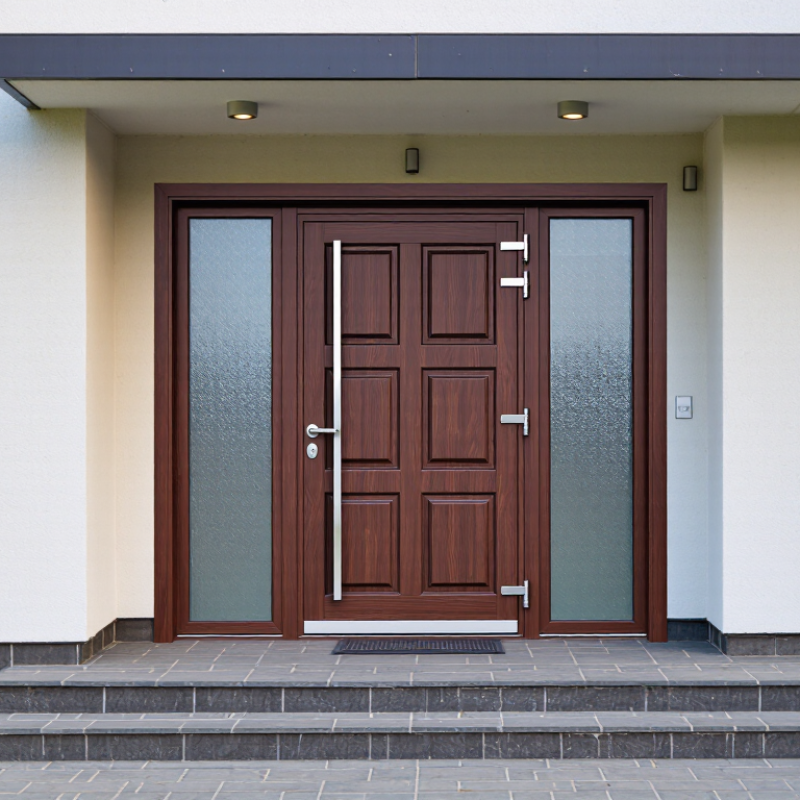
A front entry door should begin with your daily routine, not a catalog photograph. Measure the rough opening, wall thickness, threshold height, and available swing space. Check whether deliveries, furniture, or a screen door will affect clearance. A 36-inch-wide door usually improves accessibility, but the surrounding frame must support it properly. Record morning and afternoon sun exposure, wind direction, and nearby moisture sources. Small details matter.
Material choices should match your climate and maintenance tolerance. Fiberglass can resist dents and moisture, while steel often provides strong security and a stable price. Wood offers warmth, but it needs careful sealing and periodic inspection. The National Association of Realtors’ 2023 Remodeling Impact Report estimated 100% cost recovery for a new steel front door. That figure reflects resale perception, not a guaranteed return. Real homes vary.
Ask for documented performance values, including air leakage, water resistance, and thermal ratings. ENERGY STAR guidance recommends checking climate-specific efficiency criteria rather than choosing by appearance alone. Confirm whether the installer will replace damaged framing, level the sill, and seal the perimeter continuously. The American Architectural Manufacturers Association emphasizes proper installation because even a high-performing unit can fail when poorly fitted. I once underestimated threshold drainage; rain found the gap quickly. Recheck the opening, budget for repairs, and treat installation as part of the door system.
Tip 1: Compare materials honestly. Fiberglass resists moisture and dents less easily than many wood doors. Steel often offers strong security, but exposed edges can rust. Wood provides warmth and repairability, yet it needs regular sealing.
Tip 2: Check the full door system, not just the slab. The frame, sill, hinges, and glass affect performance.
Tip 3: Look for verified U-factor and air-leakage ratings. Lower U-factor usually means better insulation.
Tip 4: Inspect the core construction. A dense insulated core can reduce heat transfer and outside noise.
Tip 5: Press the weatherstripping gently. It should feel flexible, continuous, and firmly attached.
Tip 6: Examine the threshold. A poorly fitted threshold can admit drafts and rain.
Tip 7: Choose glazing carefully. Double-pane low-emissivity glass can improve comfort near the entry. In bright climates, solar heat gain also matters. Ratings are useful, but installation changes everything.
Tip 8: Ask how the frame connects to the wall. Secure fastening helps prevent movement and air gaps.
Tip 9: Consider your local weather exposure. A shaded entrance may need different glass than a west-facing doorway.
Tip 10: Use an experienced installer who follows tested procedures. I once saw a well-insulated door perform badly because the frame was slightly twisted. That mistake was expensive. Do not ignore small gaps. Check the warranty terms, maintenance requirements, and replacement options before choosing.
A secure front door begins with its frame, not its finish. The FBI Crime Data Explorer recorded 847,522 burglaries in the United States in 2022, so inspect the jamb carefully. Choose a solid-core or steel-reinforced door, then check that the frame cannot flex under pressure. Select a deadbolt with a protected cylinder and a reinforced strike plate. Use manufacturer-approved long screws. Short screws may look tidy, but they offer limited holding power. Consider a multi-point lock for taller doors. It adds cost, and I once underestimated how much alignment it needs.
Hardware should match daily use and local exposure. Test the handle with one hand, especially if carrying groceries. Choose corrosion-resistant hinges near coastal air or snowy roads. A wide-angle viewer, security glass, or a small glazed panel can improve visibility without creating an easy reach-through point. Confirm that hinges are protected when they face outward. Ask the installer about emergency release requirements before choosing electronic access hardware. Convenience can create a weak battery-dependent routine.
Weather resistance deserves equal attention. The U.S. Department of Energy reports that air leakage can account for 25–40% of heating and cooling energy use in typical homes. Check continuous weatherstripping, an adjustable threshold, and a tight door sweep. Review the NFRC label for U-factor and solar heat gain information where available. Lower U-factor generally indicates better insulation. Inspect the sill after heavy rain. A door can look premium while allowing water beneath it. I would also request installation photos, because poor flashing can defeat excellent materials. Be cautious with absolute promises; climate, orientation, and workmanship change performance.
Before buying a front entry door, measure the doorway carefully. Record the width at the top, middle, and bottom. Walls can shift slightly, and older frames are rarely perfect. Measure the height from the finished floor to the lowest point of the opening. Check the depth of the wall, frame, trim, and threshold area. A narrow measurement can cause an expensive surprise.
Do not measure only the door slab. Review the complete rough opening, including shims and installation space. I once focused on the opening width and overlooked a raised interior floor. The door fit, but it rubbed during wet weather. That mistake changed how I inspect every entrance. Use a level to check the jambs and threshold. Also note whether the door swings inward or outward, left or right, and where nearby walls or furniture may interfere. Test the path with a full arm’s movement.
Accessibility deserves practical attention. Look for a wide, unobstructed clear opening, a stable landing, and a threshold that is easy to cross. Handles should be reachable without twisting or excessive force. Consider mobility devices, packages, children, and nighttime visibility. Check regional building requirements before ordering. Measurements can be repeated. A wrong swing is harder to fix.
| Tip | Decision Area | What to Measure or Review | Reliable Guidance | Recommended Buying Action |
|---|---|---|---|---|
| 1 | Measure the existing door slab | Measure the door width, height, and thickness. Take measurements in several places because older doors and frames may not be perfectly square. | Common exterior door slabs are often about 36 inches wide and 80 inches high, but actual homes vary. Verify the existing dimensions instead of relying on a nominal size. | Record the smallest width and height measurements, then compare them with the replacement door specifications. |
| 2 | Check the rough opening | Measure the framed opening between the studs, from the subfloor or finished threshold area to the top of the opening. Check both width and height. | A rough opening normally needs additional space around the door unit for shimming, leveling, and adjustment. The exact allowance depends on the complete door system. | Use the manufacturer’s rough-opening requirement for the complete prehung unit, not only the slab size. |
| 3 | Review the frame and sill condition | Inspect the jambs, sill, subfloor, trim, and nearby wall for rot, water damage, movement, or uneven surfaces. | A new door cannot seal or latch correctly if the supporting opening is out of level, out of plumb, or damaged by moisture. | Plan for repair or replacement of damaged framing before ordering the door, and confirm whether the new sill fits the finished floor height. |
| 4 | Identify the handing and swing | Stand outside facing the door. Note which side has the hinges and whether the door swings inward or outward. | Door handing is commonly described as left-hand or right-hand, with the swing direction specified separately. Terminology can differ by supplier, so diagrams are useful. | Provide a simple sketch or photograph to the supplier and verify the hinge side, swing direction, and handle location before purchase. |
| 5 | Check the interior and exterior clearance | Trace the full swing arc and check walls, railings, furniture, light switches, cabinets, steps, and adjacent doors. | The door should open fully enough for comfortable passage without striking nearby objects or creating a dangerous conflict with stairs and walkways. | Mark the swing area on the floor with tape. Consider reversing the swing or selecting another configuration if the path is obstructed. |
| 6 | Review accessible clear width | Measure the clear passage between the open door face and the opposite stop, not simply the nominal door width. | For many accessibility applications, a minimum clear opening of 32 inches at 90 degrees is used. The applicable building code and project type must be confirmed locally. | If accessibility is important, choose a door and frame combination that achieves the required clear width after hardware and stops are installed. |
| 7 | Inspect the threshold and landing | Measure the threshold height, note abrupt edges, and check whether the approach is level and wide enough for safe entry. | Accessibility standards commonly limit thresholds to a low height, often no more than 1/2 inch, with beveled edges where permitted. Local requirements may differ. | Select a low-profile, beveled threshold when appropriate and confirm that the exterior landing does not create a trip or drainage problem. |
| 8 | Evaluate hardware usability | Review the lever or pull design, lock position, grip force, and the space available to approach and operate the hardware. | Lever-style hardware is generally easier to operate than round knobs for people with limited hand strength. Accessibility rules may also limit the force needed to operate hardware. | Choose hardware that can be operated with one hand without tight grasping, pinching, or twisting, when accessibility is a design priority. |
| 9 | Compare energy and weather performance | Review the door’s U-factor, air leakage information, weatherstripping, sill design, glazing area, and insulation type. | A lower U-factor generally indicates better resistance to heat transfer. Performance depends on the entire door assembly, installation, climate, and glass area. | Compare complete-unit performance data and choose weatherstripping and glazing suitable for the local climate and exposure. |
| 10 | Confirm code, safety, and installation details | Check local requirements for egress, safety glazing, fire ratings where applicable, landing dimensions, hardware, and weather protection. | Requirements vary by location and by whether the property is residential, multifamily, or commercial. Accessibility rules may apply differently to private homes and public facilities. | Before ordering, have the final dimensions and configuration reviewed by the installer or local building department, especially when changing the opening size or swing. |
10 Tips for Buying Front Entry Doors?
A front entry door deserves careful budgeting, not just a quick style decision. Measure the opening, threshold, swing, and surrounding trim before comparing prices. Costs may include the slab, frame, hardware, delivery, removal, and labor. A low estimate can become expensive when these items appear later. Request a written quote with each charge clearly listed. Energy performance also matters, especially near heated rooms or windy entrances. A door that feels sturdy may still allow drafts through a poorly sealed frame.
Read the warranty before paying a deposit. Check its length, labor coverage, finish protection, glass coverage, and installation requirements. Some warranties exclude moisture damage, unauthorized repairs, or normal surface changes. Keep invoices, product details, and installation photographs in one folder. It helps when a problem appears years later. Maintenance is usually simple but easy to neglect. Clean the threshold, inspect weatherstripping, tighten loose hardware, and check sealant around the frame twice a year. Coastal air, heavy rain, and direct sunlight may require more frequent attention.
Professional installation can protect both performance and warranty rights. Confirm the installer’s qualifications, insurance, references, and responsibility for accidental damage. Proper shimming, flashing, insulation, and drainage are not visible after completion, yet they control comfort and durability. Ask how the frame will be secured to the structure, not only the trim. I used to think a premium door solved most problems. It does not. A rushed installation can waste a strong product, and even careful planning may miss an uneven wall or hidden water damage.
Typical U.S. planning estimates show that the purchase price is only part of the total cost. Professional installation, finish upkeep, and long-term durability should be evaluated together before choosing a front entry door.
Estimates use representative midpoints from commonly published U.S. replacement-cost ranges. Actual prices vary by size, configuration, location, structural repairs, glass, hardware, and finish. Warranty coverage should be checked separately for the door slab, frame, glass, finish, and labor.