How to Install a Patio Door
A patio door brings daylight, fresh air, and an easy route to the yard. Installing one is more involved than sliding a frame into an opening. Accurate measurements, a sound sill, and careful weatherproofing all affect how the door operates. This guide to patio door installation explains the main stages, from checking the rough opening to fitting and adjusting the finished unit. The details can vary. A replacement may fit an existing opening, while a new opening can require professional structural work.
Before choosing a door, confirm the opening’s width, height, and depth, and check that the sill is level and the sides are plumb. Follow the manufacturer’s instructions for fasteners, sealants, and flashing; different materials and door designs may require different methods. A helper is useful when lifting a heavy glazed panel. Keep the work area clear, and use appropriate protective equipment. That matters. Even a small alignment error can cause sticking, uneven gaps, or water entry after a storm. Take your time. The steps here offer practical guidance, but they cannot account for every home, frame condition, or local building requirement. If the opening is damaged, measurements are uncertain, or the installation feels beyond your experience, ask a qualified door installer to assess it. A careful check now can prevent a frustrating adjustment later.
Assess the Opening and Choose a Suitable Patio Door
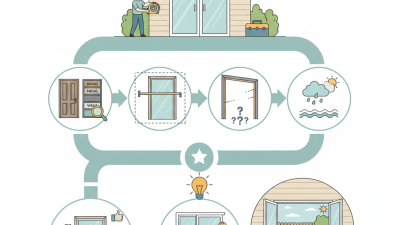
Assess the opening before choosing a patio door. Measure its width at the top, middle, and bottom, then repeat for height on both sides and in the center. Record the smallest measurements. Check that the sill is level and the jambs are plumb; a few millimeters of error can complicate installation. Look closely for soft wood, water stains, or uneven flooring. These details may reveal repairs needed before a new frame goes in.
Match the door style to the room and the measured opening. A sliding door needs clear wall space for its fixed panel, while a hinged door needs room for its swing. For glazed doors, compare U-factor and solar heat gain coefficient ratings for your climate. The U.S. Department of Energy’s Energy Saver guidance estimates that windows account for about 25–30% of residential heating and cooling energy use. A patio door is not a window, but its large glass area makes glazing performance worth checking. Follow the selected door’s installation instructions; rough-opening requirements vary by product.
Tips: Measure twice, and note the tape’s exact starting point. A small mistake is easy to make. If the opening is out of square, don’t assume trim will hide it; confirm the needed correction before ordering.
Gather Tools and Prepare the Doorway
Before opening the package, clear the work area and protect the floor. Gather a tape measure, level, square, pry bar, utility knife, drill, shims, gloves, and eye protection. Keep the new door upright on a flat surface. Glass panels are heavy, so plan to lift them with another person. No rushed lifts.
Remove interior trim carefully, then expose the rough opening without cutting blindly into the wall. Check for wiring or plumbing before driving fasteners or making cuts. Measure the opening’s width and height in several places. Compare those measurements with the door manufacturer’s installation instructions, not just the old frame. Use a level and square to check the sill and jambs; note bowed framing or soft, damp wood. Small differences matter.
Prepare a clean, dry sill and repair damaged framing before installing anything. The U.S. Department of Energy’s Energy Saver guidance estimates that air leaks can account for 25% to 40% of heating and cooling energy use in a typical home, depending on climate. That makes careful sealing worthwhile. Have compatible flashing and sealant ready, and confirm where each layer belongs. Don’t guess. I’d recheck the sill’s level before setting the door; a quick glance can miss a slight slope, and correcting it later is harder.
Install and Level the Patio Door Frame
Before lifting the patio door frame, clear dust, loose mortar, and old sealant from the opening. Check the opening’s width and height at several points; older walls are rarely perfectly even. Dry-fit the frame, then confirm that the sill pan sits flat and drains outward. A tiny dip can hold water.
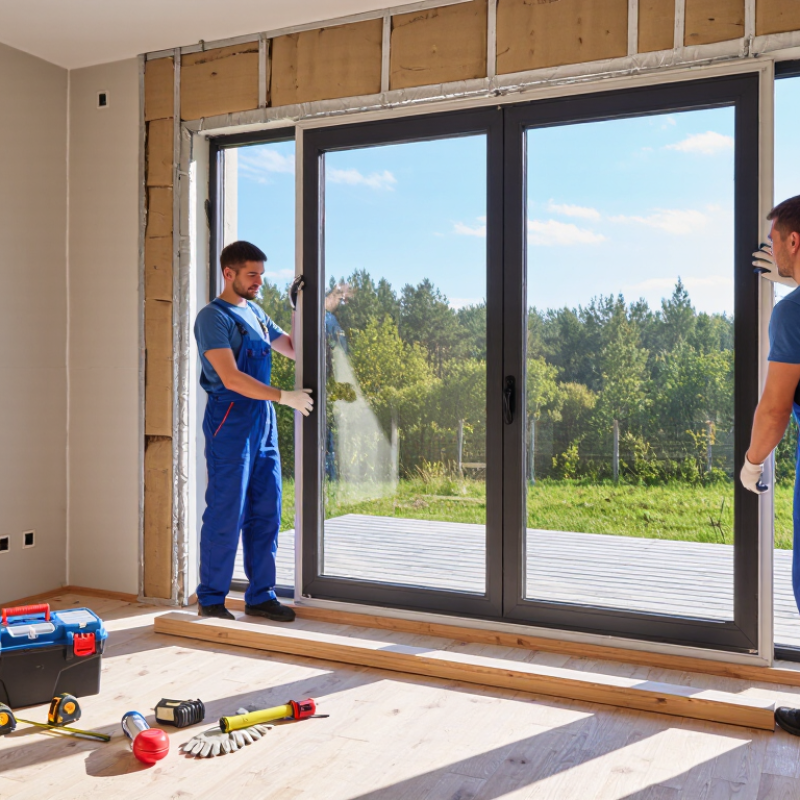
With a helper, set the frame into the opening and center it. Patio door units are awkward and heavy, so keep fingers clear of the bottom edge. Use shims near the frame’s fixing points, not random wedges along the jamb. Check the sill with a level, then check each jamb for plumb. Measure diagonally from corner to corner; matching measurements help confirm the frame is square. It can look straight and still be twisted.
Fasten the frame according to its installation instructions, tightening gradually so the jambs do not bow inward. Recheck level, plumb, and diagonal measurements as you go. This step is easy to rush. I’d rather loosen a fastener and adjust a shim than force the sliding panel past a tight spot. Before adding trim, slide the panel open and closed several times, and inspect the sill for gaps where water could enter.
Fit the Panels and Adjust Their Movement
With the frame secured and square, prepare to fit the panels. Patio door panels can be heavy, especially when glazed, so have another adult help lift and guide them. Check the installation instructions for the correct order; some systems require the fixed panel to go in before the sliding panel. Usually, the panel’s top edge engages the upper track before its rollers are lowered onto the sill track. Keep fingers clear of pinch points.
Once the panels are seated, slide the moving panel slowly from end to end. It should travel without scraping, sticking, or jumping the track. If it drags, use the adjustment screws near the lower corners to raise or lower the rollers. Turn each screw a little at a time, then test again. Small changes matter. I’ve found it easy to overcorrect when adjusting both sides too quickly, so pause and compare the gap along the panel’s edge.
Look for an even gap between the moving panel and frame, and check that the lock meets its keeper without forcing it. Clean grit from the track, since even a small pebble can disrupt movement. If the frame shifts, the panel remains difficult to move, or the glass appears stressed, stop and recheck the frame and manufacturer’s guidance before continuing. A smooth glide is the goal.
Seal the Frame and Check the Installation
Once the patio door sits square, seal the frame without blocking its drainage paths. Check that the sill is level and the jambs are plumb; a door that looks straight can still bind at the bottom. Add backer rod to wider exterior joints, then apply compatible sealant in a continuous bead. Inside, use low-expansion window-and-door foam around the frame. Too much foam can bow the jamb. Small gaps matter.
The U.S. Department of Energy reports that heat gain and loss through windows account for about 25–30% of home heating and cooling energy use. A patio door is not identical to a window, but the figure shows why a leaky frame deserves attention.
Follow the door maker’s installation instructions and the Fenestration and Glazing Industry Alliance’s installation guidance. After sealing, open and close the panel several times. Check for even reveals, smooth locking, and daylight around the frame. I would recheck the lower corners; they are easy to overlook when the caulk looks neat.
Tips: Use a damp cloth to clean the joint before sealing. Keep weep holes clear, and avoid testing the door until foam has cured. If the latch needs force, revisit the shims and alignment rather than tightening screws blindly.
 Skip to content